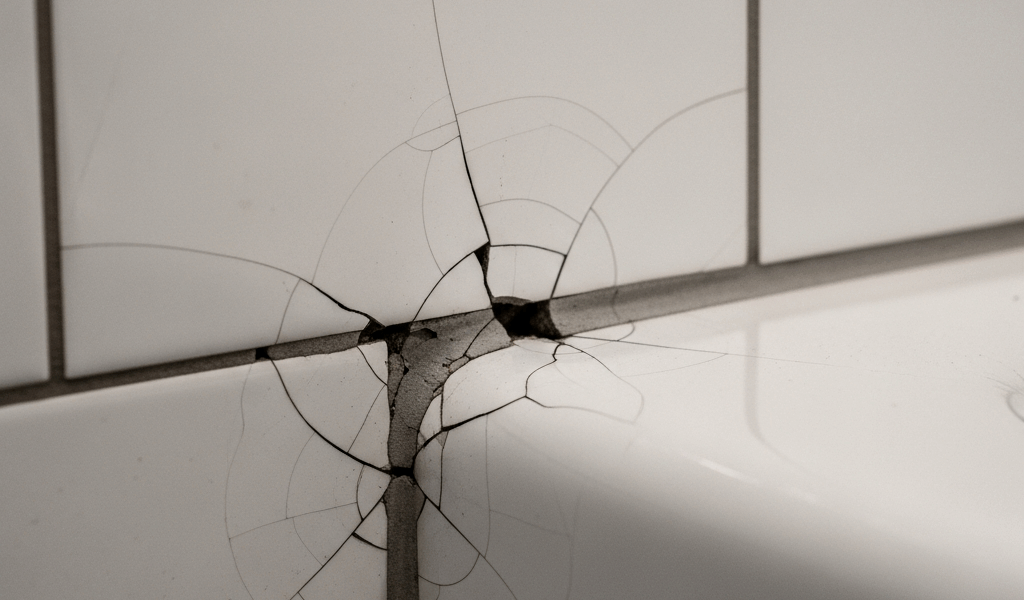
Why Grout Cracks at the Tub Line
Bathroom grout repair has gotten complicated with all the conflicting advice flying around. As someone who’s fielded this exact repair call more times than I can count — and made the same mistake myself on my own tub back in the day — I learned everything there is to know about why grout keeps cracking at that tub edge. Today, I will share it all with you.
But what is the tub-to-tile joint, really? In essence, it’s a movement joint. But it’s much more than that — it’s the single most misunderstood seam in the average bathroom.
Most DIY articles treat it like any other grout line. It isn’t. Fill a tub with 40 gallons of water, step in, and that fiberglass or acrylic shell deflects under your weight. Temperature swings make it expand and contract. Grout is rigid and brittle. It cannot flex. Six months to two years later — crack.
That’s not a workmanship failure. That’s a material selection failure.
Here’s the distinction worth burning into your memory: cracking directly where tile meets tub edge is a movement joint failure. That’s what we’re fixing. Cracking in the field tiles above the tub — tiles with no contact with the tub lip — is a different animal entirely. That points toward substrate movement, shoddy installation, or water damage behind the wall. Bigger conversation. Different job.
Check for Water Damage Before You Repair Anything
Probably should have opened with this section, honestly. Before you buy a single tube of caulk or dig out an oscillating tool, spend five minutes on a damage assessment.
Press on the wall tiles around the tub surround with the heel of your hand. Hard and immobile — good. If any tile rocks or flexes, or if the drywall behind it feels soft or spongy, stop immediately. Water has already gotten inside the wall. Slapping a cosmetic caulk repair over a compromised substrate just hides the problem while damage keeps spreading underneath. You’ll be back in six months watching mold colonize the wall cavity.
Same rule applies if you spot discoloration on the drywall, soft patches on the wall surface, or any musty smell near the tub surround. Those signs mean the crack has been leaking for a while — probably longer than you’d like to think about.
Water damage behind the tile means you need a contractor. Membrane repair or a full retile with proper waterproofing. Not a caulking afternoon project anymore.
Assuming the wall is solid and the tiles aren’t budging, you’re clear to move forward.
How to Remove Old Grout and Prep the Joint
While you won’t need a full tile demolition kit, you will need a handful of basic tools. A grout saw works. A carbide grout rake works. An oscillating multi-tool with a grout blade attachment works best — faster and far more controllable. A DeWalt DCS356B or a Makita XMT03Z with variable speed runs about $80 to $120 if you don’t already own one. Grout blade attachments run $8 to $12 at any hardware store.
Your goal is simple: remove every trace of old grout from the joint. Cut along both edges — tile-to-tub and tile-to-tile — clearing the joint to a depth of roughly ¼ inch. Move slowly. You’re not scoring the tile surface or the tub. You’re just evacuating old grout.
Once the joint is cleared, vacuum it thoroughly. A shop vac works best, but a handheld vac does the job. Pull out all dust and debris. Then wipe the joint down with a rag dampened in rubbing alcohol — nothing fancy, standard 70% isopropyl from the drugstore. Let it dry completely. Thirty minutes minimum. Longer if your bathroom runs humid.
Don’t make my mistake. I rushed this step on my first attempt, applied new caulk over grout dust and residual moisture, and watched the whole thing peel away in about three weeks. This prep stage is where most DIY repairs actually fail — not the application itself.
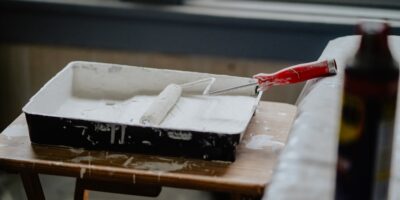
Caulk Not Grout — What to Use and How to Apply It
The fix is straightforward once the root cause makes sense: caulk at the tub-tile transition, not grout. Full stop.
Specifically, you want 100% silicone caulk or a siliconized latex caulk labeled as sanded. I’m apparently sensitive to silicone fumes and GE Supreme Silicone works for me while standard 100% silicone in unventilated bathrooms never does. Worth knowing your own situation before you commit. Sanded means the product contains fine silica particles — they match the color and texture of standard bathroom grout so the repair blends rather than screaming “patch job.” Look for it labeled “Tub and Tile Caulk” or “Kitchen and Bath Sealant.” Big-box stores carry it everywhere. A tube runs $4 to $8. Buy the shade that matches your existing grout color as closely as possible. Light gray grout gets light gray caulk. White gets white. Simple.
Here’s the application process:
- Mask both sides of the joint with painter’s tape. Position each strip roughly ⅛ inch back from the joint edge — this keeps the caulk line narrow and clean-looking. Tape does the hard work of creating straight edges so you’re not trying to hand-tool a perfect line.
- Load your caulk gun and cut the nozzle at a 45-degree angle. Start with a small opening, roughly toothpick-sized. Expand slightly if the bead isn’t filling the joint adequately.
- Apply the caulk in one continuous pass along the entire joint length. One bead. Steady pressure. Consistent speed. Stopping and starting creates voids — gaps where water gets in and the whole repair starts failing from day one.
- Tool the bead immediately with a wet finger or a plastic caulk smoothing tool. Dampen your finger with plain water and run it along the bead in a single direction. This presses the caulk into the joint and forms a concave profile — that shape sheds water instead of collecting it.
- Pull the painter’s tape while the caulk is still wet. Ten to fifteen minutes max. Wait until it skins over and tape removal drags caulk out of the joint with it.
- Let it cure fully before any water contact. Most silicone caulk needs 24 to 48 hours. Check the label. That’s what it’s there for.
Active work time on the whole job is roughly 30 minutes. That’s what makes this repair endearing to us DIYers — low barrier, real results.
How Long It Lasts and When To Call a Pro
A properly installed caulk joint at the tub-tile line should hold for five to ten years. Not permanent — caulk degrades from UV exposure, water saturation, and regular use. Plan to re-caulk every five to seven years as normal bathroom maintenance. Put it on the calendar.
If your caulk fails in under two years, something else is driving the problem. Incomplete removal of old material means the new caulk never bonded properly. Water damage behind the wall means the substrate itself is moving. Tub deflection that exceeds what any flexible sealant can absorb means the fixture itself may be inadequately supported. These aren’t caulking problems.
Systemic cracking across the entire tub surround — not one or two isolated spots, but multiple areas failing simultaneously — suggests structural movement or failed waterproofing behind the tile assembly. That’s a Schluter strip, a full retile with a proper waterproof membrane, or a structural assessment. So, without further ado, know when to make that call: recurring widespread failure across the whole surround means a contractor, not another tube of caulk.
For isolated cracking at the tub edge? This repair is exactly right. It addresses the actual cause instead of just covering the symptom until next season.
Stay in the loop
Get the latest northwest renovate updates delivered to your inbox.