Why Bathroom Floor Tiles Crack for No Obvious Reason
Bathroom tile cracking has evolved with all the bad advice flying around. Everyone blames the tile itself. I did too — for about three months, I stood there staring at a hairline crack running across my floor, convinced I’d bought a defective product. Turns out I was wrong. Completely wrong.
The tile was fine. What lived underneath it wasn’t.
That’s the core problem most homeowners never figure out. The crack you see is just the messenger. Here are the five actual culprits:
- Subfloor flex. Wood or cement board beneath your tiles bounces slightly every time you walk on it. Tiles are rigid. They hate movement — like, genuinely cannot tolerate it.
- Missing or failed expansion joints. Tiles expand and contract with temperature swings. No room to move means nowhere for that stress to go. So it goes into the tile face instead.
- Improper thinset application. Thinset mixed wrong, applied too thin, or not allowed to cure properly leaves tiles sitting on an unstable bed. That bed eventually shifts.
- Foundation settling or movement. Your house shifts. Not dramatically. Just enough — a millimeter here, two millimeters there — to stress whatever’s directly above it.
- Temperature and humidity swings. Bathrooms are wet rooms. Moisture works its way under tiles, wood subfloors swell and shrink in response, and the tile above absorbs every bit of that movement.
What makes this maddening? Your tiles look completely normal on the surface. The damage lives underneath. Replace them today without fixing the root cause and you’ll watch new cracks appear in eight months. I’ve seen it happen. I’ve personally made it happen.
How to Diagnose the Root Cause Before You Replace Anything
Worth putting near the top. Most tile repair guides jump straight to “remove tile, apply thinset, done” — which is exactly how you end up doing this repair every single year on a rotating schedule.
The Tap Test — Find Hollow Tiles
Grab a screwdriver. Use the handle end. Tap the cracked tile and everything surrounding it, listening carefully as you go. A solid tile sounds dull and dense — almost thudding. A hollow tile sounds exactly like what it is: hollow, with a faint echo underneath. That hollow sound means thinset never bonded properly. Mark every hollow tile with painter’s tape. They’ll crack or pop loose eventually, whether they’ve started yet or not.
Press on the Subfloor Around the Crack
Push down hard on the floor immediately around the cracked tile. Then try the tiles adjacent to it. Does anything feel bouncy? Does your body weight make the floor flex and spring back? A floor that moves under pressure is a subfloor problem — not a tile problem. Write that distinction down somewhere. It completely changes your repair strategy.
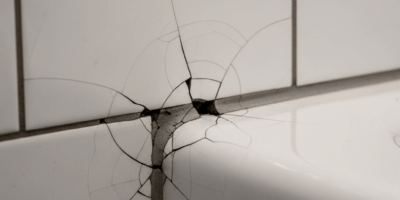
Examine the Crack Pattern
Linear cracks running in a straight line across multiple tiles usually signal movement or settling. Your house shifted slightly, and the tile line just documented it. Random cracks scattered across individual isolated tiles point more toward installation defects or localized subfloor failure. One pattern might mean a call to a structural engineer. The other means you can probably handle this yourself. The crack pattern is your first real clue.
What to Fix First Before You Touch the Tiles
This is where DIY tile repair splits off from just doing the wrong thing twice and paying for it both times.
Stiffen the Subfloor
If pressing revealed flex, reinforcement comes before reinstallation. Full stop. You’ve got two main approaches here:
- Add blocking between joists. On second floors or above basements, joists sometimes span too far without support. Measure the distance between joists — typically 16 inches on center in most residential construction. If your span exceeds 16 feet, you’ll need blocking. That’s 2×6 or 2×8 lumber sistered between joists to cut the flex down. Materials run about $40–$120 depending on how much you need.
- Pour self-leveling underlayment. For cement board or slab subfloors, products like Henry 547 or Ardex fill low spots and create a rigid, unified surface. A 50-pound bag covers roughly 50–75 square feet and costs $35–$50 at most hardware stores.
Skip this step and replacement tiles crack again. I’m apparently someone who had to learn this twice — my first attempt I ignored the flex entirely, installed fresh tiles, and watched cracks reappear six months later. Second attempt I added blocking first. That was 2019. Those tiles are still perfect. Don’t do what I did.
When to Call a Professional
Soft spots, spongy areas, or deflection that doesn’t spring back when you step off — those are different problems entirely. That’s potential rot or structural failure, and no amount of thinset fixes structural failure. A structural engineer or foundation specialist consultation runs $200–$400. That’s real money, but it’s not $2,000-in-wasted-repairs money, which is the alternative.
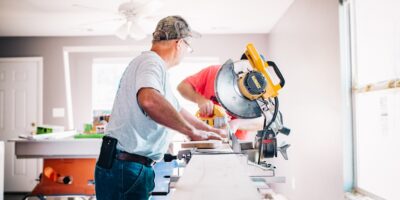
Step-by-Step: How to Replace Cracked Bathroom Floor Tiles
Remove the Cracked Tile Without Damaging Neighbors
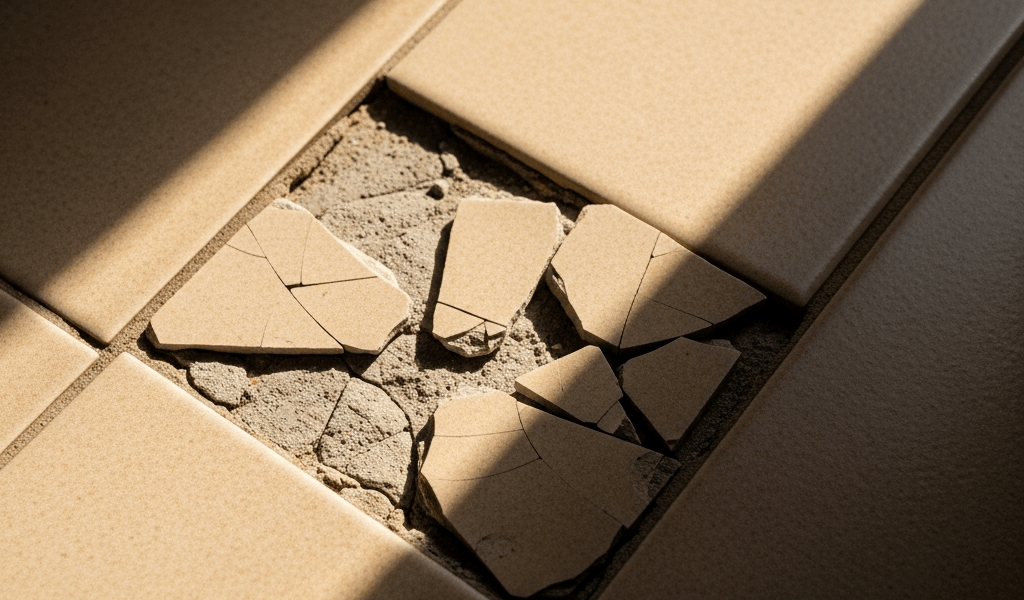
Start with a grout saw along every grout line surrounding the damaged tile. Wear safety glasses — grout dust is sharp and it absolutely will find your eyes if you let it. Use a cold chisel and hammer to break the tile into manageable chunks, working from the center outward. Never pry from the edges near neighboring tiles. Once the pieces are out, scrape every bit of old thinset off the subfloor using a floor scraper or wide chisel. The surface underneath needs to be flat and clean before anything else happens.
Choose the Right Thinset
Polymer-modified thinset rated for wet areas — that’s what you need here. Mapei Ultraflex 2 or Schluter All-Set are both industry standards worth trusting. Unmodified thinset? No. Mastic? Absolutely not. Both fail in wet environments, sometimes faster than you’d expect. The polymer modification is what lets the thinset handle moisture and minor movement without giving up. A 50-pound bag runs $20–$30 and covers 50–75 square feet depending on tile size and subfloor condition.
Apply Thinset Correctly
Mix to peanut butter consistency — not soupy, not crumbly. Let it slake for five minutes, then mix it again. That second mix matters. Apply with a notched trowel held at 45 degrees: 3/8-inch notch for 12×12 tiles, 1/2-inch notch for anything larger. Comb the thinset in one direction only. Press the replacement tile in with a slight twisting motion to embed it and push out any air pockets. Set a level on top. If the tile rocks even slightly, pull it and adjust.
Grout and Seal
Wait a full 24 hours before grouting. In bathrooms, epoxy or urethane grout — not cement grout. Epoxy grout like Aqua Mix runs $35–$50 per unit, which feels like a lot until you remember that cement grout in wet environments grows mildew and degrades faster than you want to deal with. Apply with a rubber float, wipe excess after about 15 minutes before it hardens into something nearly impossible to remove.
Here’s the honest bit: new grout won’t match your existing grout color. Not even close, especially in an older bathroom. Most homeowners don’t realize this until the job is done and they’re staring at an obvious patch. Stain the surrounding old grout to match the new, or make peace with the visual difference. It’s not a flaw in your work — it’s just reality.
How to Prevent Bathroom Floor Tiles From Cracking Again
What you do next depends on what caused the original failure. But some of this applies almost universally.
Install expansion joints along walls. Tiles need a 1/4-inch gap at every perimeter where they meet walls. That space allows expansion without compression against a rigid surface. Fill those gaps with foam backer rod and caulk — not grout. Caulk flexes. Grout doesn’t. That difference is the whole point.
Use an uncoupling membrane if subfloor movement persists. Even after reinforcement, some movement remains in wood-framed floors — that’s just physics. Schluter-DITRA and similar uncoupling membranes are thin plastic sheets with a waffle-grid underside that decouple the tile plane from the subfloor plane entirely. Substrate moves; tiles don’t have to move with it. Install this before laying thinset and new tiles. It adds $2–$4 per square foot but it’s probably the single most effective crack-prevention measure available.
Distribute heavy loads carefully. A large vanity cabinet sitting directly over the drain area concentrates weight in the worst possible spot. Spread heavy fixtures across multiple joists wherever possible. Same goes for soaking tubs, which are heavier than most people estimate when full.
The final truth here: if your subfloor stays flexible despite everything you’ve done, tile might simply be the wrong finish material for that particular floor. Luxury vinyl plank, cement board surface treatments, or a full uncoupling membrane system solve problems that tile alone cannot. Sometimes the real fix isn’t replacing the tiles — it’s accepting that tiles aren’t the right answer for your specific subfloor condition and choosing something that is. That’s not failure. That’s just wisdom arriving a little late.
Stay in the loop
Get the latest northwest renovate updates delivered to your inbox.