Standard Shower Curb Height by Code — What the IRC Actually Says
Shower curb height has become harder to navigate with all the conflicting advice flying around. As someone who spent three hours buried in the IRC during my first bathroom renovation five years ago — plus another thirty minutes on hold with my local building department — I spent months getting comfortable with what’s actually required versus what you’ll see in real-world installations. Today, I will share it all with you.
The short answer: the IRC requires a minimum 2-inch rise above the drain pan. That’s it. Two inches. Not six. Not four. Two.
Water needs somewhere to go — that’s the whole logic behind the requirement. A curb that’s too low lets water escape into your subfloor. Too high becomes a tripping hazard and makes the shower feel like a phone booth. The 2-inch minimum establishes a baseline that handles water management in standard residential showers.
Here’s where people get confused. Local codes override the IRC. Your city or county might require something completely different. I learned this the hard way when an inspector rejected my 2.5-inch curb on a second project — our municipality required a minimum 3-inch height. No warning. Just a red tag on the framing. I rebuilt the entire shower base. Steer clear of where I went wrong.
Call your building department before you start. Not email. Call. Five minutes on the phone saves you from expensive, time-consuming mistakes that nobody wants to deal with mid-project.
The governing code section is IRC P2712.1 — Shower and Bath Enclosures. It says the curb or threshold must be “of sufficient height to prevent water from splashing or flowing out of the enclosure.” That vague language — “sufficient height” — is exactly why interpretation varies so much from one jurisdiction to the next.
In practical terms, here’s what that means:
- Minimum 2 inches above the finished floor and drain
- Maximum recommended height varies by accessibility standards
- Must work with your specific tile, waterproofing system, and drain location
- Local amendments supersede the base code
Some jurisdictions also pull in the International Energy Conservation Code for steam shower requirements, which can affect curb specs. But for standard residential showers? The 2-inch minimum is your starting point.
What Height Actually Works Best — Why 3 Inches Became Standard Practice
Two inches is code-compliant. It’s not what most experienced contractors actually build. There’s a real reason for that gap.
Frustrated by repeated water damage callbacks across his network, a senior contractor named Dan — installing showers since the mid-1980s — sat me down with a folder of photos showing water intrusion at curbs built exactly to that 2-inch minimum. The math stopped working once you factored in real tile thickness, grout lines, and the unpredictable way water actually moves through a shower.
Most professional installers work with 3 to 4 inches. Here’s why that matters.
At 2 inches, there’s almost zero margin for error. Grout thickness alone runs roughly 3/8 inch. Add porcelain tile — typically another 3/8 to 1/2 inch — plus the mortar bed underneath, and you’re already pressing against your code-minimum height before a single drop of water touches anything. Water doesn’t respect thin margins. It finds edges. It migrates under tile. It pools in grout joints until something gives.
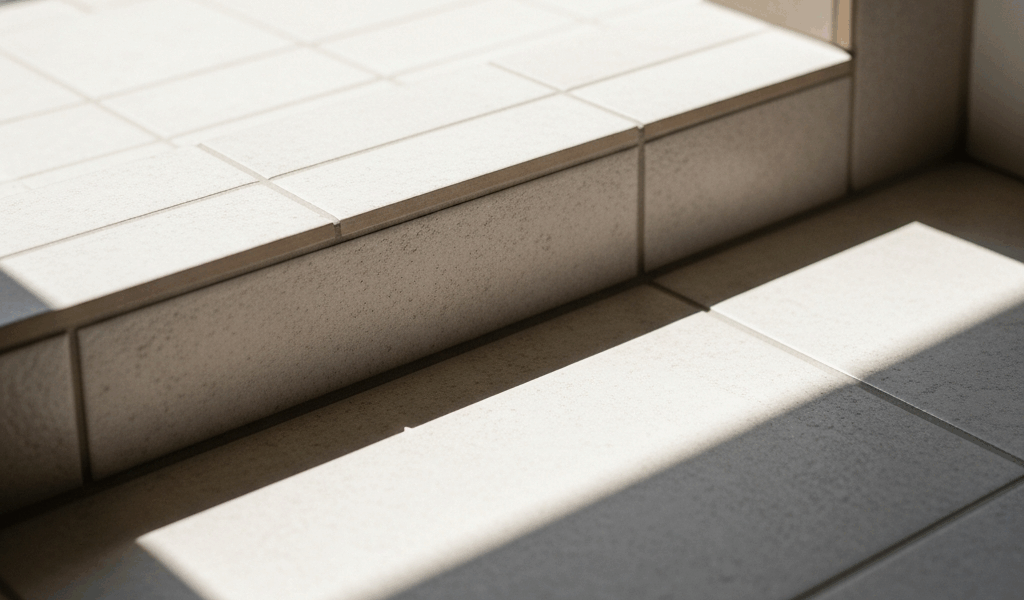
Three inches buys breathing room. High enough to contain splash. Low enough that it doesn’t feel like climbing into a bathtub. Most people step over a 3-inch curb without consciously thinking about it — it sits right in the natural range of a standard stair rise.
Four inches is where things get awkward. For older adults or anyone with mobility limitations, a 4-inch curb becomes a genuine barrier. It’s also the height where people start hesitating before stepping in rather than moving naturally.
Two and a half inches? That’s a compromise height I’ve seen used in retrofit situations where ceiling height or existing framing limits options. Not ideal. It works if your waterproofing is meticulous — and I mean meticulous.
The sweet spot for most bathrooms is 3 inches from finished floor to finished curb top. That number accounts for:
- Standard porcelain tile thickness (3/8 to 1/2 inch)
- Mortar bed height (3/4 to 1 inch)
- Grout line width (3/8 inch)
- Natural step height comfort zone
- Adequate water containment
- Accessible threshold height for most people
That’s the number I use on every project now. Three inches. It satisfies code, plays well with standard materials, and I haven’t had a water intrusion issue since I stopped trying to build at minimum code height. That’s what makes the 3-inch standard endearing to contractors and tile installers who’ve learned the hard way.
ADA and Accessibility Considerations — Planning Ahead for Aging in Place
Important part first. ADA requirements contradict standard residential code in a way that genuinely surprises most DIY remodelers — and even some pros.
The ADA specifies that accessible showers must have either a zero-threshold entry or a maximum threshold of 0.5 inch. Half an inch. That’s dramatically lower than the IRC’s 2-inch minimum. This is the gap nobody mentions until someone actually needs it.
If you’re renovating for someone with mobility challenges — or thinking about aging in place — a traditional curbed shower won’t work. You need a completely different approach.
The conflict is real. IRC and ADA point in opposite directions. You cannot legally build an ADA-compliant shower with a 2 or 3-inch curb. Period. So, without further ado, let’s dive into what your options actually look like.
Zero-Threshold Showers
The shower floor sits level with the bathroom floor. No curb. Water containment relies entirely on slope and waterproofing — specifically, the floor slopes at least 1/8 inch per foot toward the drain. Sounds straightforward. It isn’t.
Zero-threshold showers require:
- Sloped subfloor framing (typically engineered as part of the original design)
- A complete waterproofing membrane system that wraps walls and extends beyond the drain area
- Proper substrate preparation — usually cement board or specialty waterproof board
- Careful attention to floor transitions so the slope isn’t visually obvious
The cost difference is significant. A standard curbed shower with basic waterproofing runs roughly $2,500 to $4,000 for materials and labor. A zero-threshold shower in the same footprint costs $4,500 to $6,500. The complexity justifies it when accessibility is a real requirement.
Low-Profile Thresholds
Some builders use a 0.5-inch threshold as a practical compromise. Higher than ADA-preferred, lower than standard curbs. It works with wheelchair access if the threshold is beveled properly. It still contains more water than zero-threshold setups.
I’m apparently a convert to this option for uncertain situations — and it works for me while the all-or-nothing approach never quite does. It’s not perfect for either standard or accessible use, but it bridges both requirements better than most people expect.
Curbless Waterproofing Systems
Modern waterproofing membranes — products like Schluter-Kerdi, Mapei Mapelastic, or Custom Building Products Hydroban — have improved enough that zero-threshold showers are genuinely reliable when installed correctly. These aren’t improvised solutions. They’re engineered systems with specific installation sequences you follow step by step.
The membrane seals the entire substrate, wraps drain assemblies, and extends beyond the drain perimeter. Installed correctly, water reaches the drain and not the substructure. That’s the entire point.
If you’re building new, plan for accessibility now — even if it’s not an immediate need. The cost difference at construction time is modest. Retrofitting later is exponentially more expensive and disruptive.
How to Build a Shower Curb That Lasts — The Details That Prevent Callbacks
Building codes tell you the height. Experience tells you what actually lasts. These are genuinely different things.
Substrate and Framing
The curb starts below the tile. It starts with framing. Most residential curbs get built one of two ways: concrete block or wood frame.
Concrete block is more common in new construction. Standard blocks run 8 inches tall by 8 inches wide. Stack them to your desired curb height, then cap with a poured concrete top or mortar bed. Straightforward and durable — if properly waterproofed.
Wood-frame curbs show up more in retrofits where you’re working around existing floor framing. You build a frame from pressure-treated 2×4 or 2×6 lumber, fill it with blocking to stiffen it, then cap with cement board or mortar bed. Faster than block. Requires more rigorous waterproofing attention because wood rots when water finds a way through the membrane.
Whichever method you use — the frame must be rigid. A curb that deflects under weight will crack tile and grout, opening water pathways directly into your subfloor. This is where most amateur installations fail. The frame is too flimsy, improperly braced, or built with untreated lumber. That was a $4,200 mistake on one retrofit I watched get demolished eighteen months after install.
Waterproofing — The Part That Actually Matters
But what is proper curb waterproofing? In essence, it’s a continuous membrane that prevents any water from reaching the substrate beneath. But it’s much more than that — it’s the difference between a shower that lasts twenty years and one that quietly destroys your subfloor while looking perfectly fine from the outside.
The membrane must:
- Cover the entire top surface of the curb
- Wrap down both interior and exterior sides
- Extend a minimum of 6 inches beyond the drain in all directions
- Be continuous — no breaks, no overlaps that allow water to pass underneath
- Be installed before any tile is laid
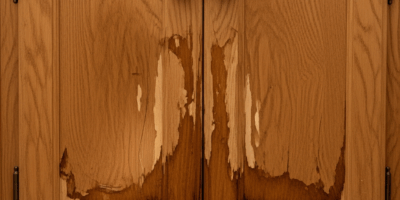
Most water damage in shower curbs happens because the membrane stops at the curb edge. Water migrates under the tile, under the curb, into the subfloor — and then you get soft spots, mold, and structural damage that doesn’t surface until years later.
I’ve watched curbs fail even with good waterproofing because the membrane wasn’t wrapped correctly around drain edges. The drain assembly is a natural water collection point. If the membrane doesn’t seal around it properly, water finds the gap.
Use a liquid or sheet membrane — not just mortar-bed waterproofing. Mortar alone isn’t a true waterproof barrier. It’s water-resistant cement. Not the same thing. Schluter Kerdi, Mapei Mapelastic, or similar products are engineered specifically for water containment in curb applications.
Tile and Grout Finish
Once the membrane is set, tile goes down. Standard porcelain tile — 12×24 inch or similar — is typical for most residential projects. Anything slicker than matte finish is a slip hazard, so texture actually matters here.
The curb top should use bullnose or radius tile. A sharp tile edge on the curb is uncomfortable underfoot and collects algae and soap scum that’s nearly impossible to clean. A rounded edge sheds water and stays cleaner with less effort.
Grout selection matters more than most people expect. Use epoxy or urethane grout — not standard cement grout — for shower areas. Cement grout absorbs water over time and will eventually fail in a consistently wet environment. Epoxy costs roughly 40% more per bag. It also lasts decades without resealing.
Common Failure Points to Avoid
Cracks at the inner corner where the curb meets the shower floor: this happens when the curb shifts independently of the floor. Prevent it with proper substrate connection and a flexible grout joint at that specific corner — not standard grout, a flexible caulk.
Water pooling on the curb top: that’s improper slope. The top should pitch slightly — at least 1/8 inch per foot — toward the shower interior so water drains toward the floor rather than sitting on the curb surface.
Soft spots around the curb base: the waterproofing failed or was incomplete. Usually discovered too late. Prevention is the only real option here.
Tile separating from the curb edge: inadequate thinset or substrate movement. Use a modified thinset rated specifically for shower applications — something like Laticrete 254 Platinum or Custom Building Products FlexBond — and make sure the substrate isn’t shifting.
The thing nobody tells you is that curb installation is one of the only shower components with no margin for correction. Once the waterproofing is set and tile is laid, the substrate is inaccessible. It either works or it doesn’t. There’s no going back without a full demo.
That’s why experienced installers spend more time on curb prep than on any other single shower component. The tile you see is the smallest part of what makes a shower last twenty years instead of five.


Stay in the loop
Get the latest northwest renovate updates delivered to your inbox.