Rain Leak vs Condensation — How to Tell the Difference
Bathroom vent fan leaks have become tricky with all the conflicting advice flying around. Because here’s the thing nobody tells you upfront — there are two completely different failure modes hiding under the same symptom. I spent three hours last November chasing what I was convinced was a roof cap problem, crawling through a 40-degree attic with a flashlight and a bad attitude, only to discover the real culprit was condensation freezing inside an uninsulated duct run. Learn from what tripped me up. The diagnostic matters because the fixes point in completely opposite directions.
Ask yourself these questions first:
- Does water appear during or within an hour of rain, or does it show up hours later — even during dry weather?
- Is the water pooling in the fan housing itself, or dripping from somewhere along the duct in your attic?
- Are there visible debris, dirt streaks, or roof granules around the wet area?
This is the piece to know up front. Water showing up during rain events, leaving visible debris, or tracing back to the roof penetration? That’s actual rain intrusion through the roof cap. Water appearing after showers in cold weather, collecting inside your duct, happening rain or shine? Condensation. The distinction matters because a condensation problem won’t be fixed by replacing your roof cap. You’ll swap it out, the dripping continues, and you’ll assume the new cap is defective. Rain intrusion won’t be fixed by insulating your ductwork. You need to know which one you have before touching anything.
Why Rain Gets In Through the Roof Cap
Builder-grade roof caps are terrible. That’s not hyperbole. Homes built in the last 15 years often ship with plastic or thin-metal caps that cost $8 wholesale and fail within five to eight years — especially in Pacific Northwest weather. Three failure modes show up constantly.
Missing or Stuck Damper Flap
The flap inside your roof cap swings open when air flows out, then falls shut to block rain and pests. Except it gets stuck open. Ice builds up on it. Installers occasionally skip it entirely and never install it at all. A stuck-open damper is basically an open hole in your roof. Rain runs straight down the duct, no drama required.
No Drip Edge or Improper Installation
Quality roof caps have a drip edge — a lip extending past the flashing so water sheds away from the penetration. Cheap caps sit flush against the flashing. Water pools around the base, finds the seams, works its way down. Even worse, some installers caulk the cap directly to the roof instead of letting the flashing handle water management. That caulk fails within a few seasons, and suddenly you’ve got a sealed gap where water just sits and waits.
Cap Sitting Too Low on Low-Pitch Roofs
Shallow-pitch roofs — 3:12 or flatter — don’t run water straight down. Water sheets across the surface instead. A cap sitting too low catches that sheet, and water banks up around it rather than flowing past. This happens surprisingly often with retrofit installations where whoever did the work didn’t account for pitch when picking cap height.
How to Inspect and Replace a Bathroom Vent Fan Roof Cap
Start in the attic. Open the hatch, grab a decent flashlight — I use a Streamlight ProTac, nothing fancy — and locate the ductwork. Follow it toward the roof penetration. You’re looking for visible cracks in the plastic housing, disconnected sections, bird nests crammed inside the duct (yes, this happens more than you’d think), or a damper flap visibly stuck open.
If the housing looks fine from below, you need to get on the roof. Use a ladder stabilizer and a harness if steep slopes make you nervous. The cap should sit level and secure, with caulk around the base where it meets the flashing. Look for:
- Cracked or degraded caulk around the flashing perimeter
- Gaps between the cap and flashing — if you can see daylight, water can get through
- Corrosion or rust on metal caps
- The damper flap physically stuck or frozen in place
- Missing or broken hood slats creating unobstructed water paths straight into the duct
Damage found? Replacement is almost always the right call. Cap prices run $25 to $60 for decent ones. A basic louvered cap with a built-in backdraft damper — something like a Dundas Jafine ProSeal or a Broan model with “heavy-duty” in the description — handles persistent rain well. Avoid plastic caps entirely in wet climates. UV exposure and temperature cycling destroy them within a few years.
The actual replacement is straightforward if you’re comfortable on a roof. Remove the old cap, strip the old caulk and flashing, install new flashing — don’t skip this step — and seat the new cap with roofing cement underneath. Caulk the base, not the top of the cap. You want water sheeting off, not pooling. Not comfortable on a roof? Call a roofer. Cap replacement typically runs $150 to $300 labor included, which beats repairing a water-damaged ceiling by a wide margin.
Fixing Condensation That Looks Like a Leak
Condensation forms when your flex duct run is cold and exposed to humid bathroom air. Warm, wet air hits the cold duct walls, moisture condenses on the interior, and gravity handles the rest. This is especially common in older Pacific Northwest homes where the duct runs through an unheated attic — sometimes 20-plus feet before it ever reaches an exterior wall.
The fix has two parts. First, insulate the duct. Wrap the entire flex run with fiberglass duct insulation — the kind with the foil vapor barrier facing inward. You can buy pre-wrapped flex duct or wrap standard duct yourself. Cost runs roughly $0.75 per linear foot. A 25-foot run costs about $20 in materials. That’s it.
Second, make the duct run as short as possible. If your duct snakes through the attic on a scenic tour before reaching the exterior, shorten it. Every foot of unheated duct sitting in a cold attic is a condensation factory. Reroute to the nearest exterior wall if you can, or go heavier on the insulation if rerouting isn’t realistic.
Condensation should stop within a few days of insulating. If it persists, check whether the bathroom fan is actually running at full capacity — and make sure the damper moves freely when the fan kicks on. A stuck damper traps humidity inside the duct where it just keeps condensing.
When the Fix Did Not Work — What to Check Next
Replaced the cap and water still shows up? Three more things worth investigating before you call it unsolvable.
The duct disconnected somewhere in your attic. Flex duct connections are held by hose clamps. If one worked loose, air escapes into the attic instead of exiting the house — and moisture settles there rather than leaving. Climb up and physically check every connection point. Tighten any loose clamps while you’re up there.
Flashing failure separate from the cap. The roof flashing around the duct penetration can fail on its own. Cracks, rust, or separating sealant means water enters even if the cap is brand new and perfectly installed. This requires a roofer to address properly — flashing work involves deck-level repairs that generally shouldn’t be DIY territory.
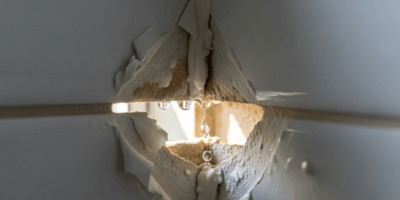
The housing itself is cracked. Older plastic fan housings develop cracks from years of thermal cycling or the occasional impact. Water seeps through the crack, bypassing the cap entirely. Spot a crack? The fan assembly needs replacing, not just the cap. Figure $200 to $400 depending on duct configuration and how accessible everything is.
If none of these reveal the source, you’ve got a roofer-level problem. Hire one to inspect the entire vent penetration area. You’ll spend around $150 on a diagnostic visit — but you’ll stop guessing, which is honestly worth every dollar of it.
Stay in the loop
Get the latest northwest renovate updates delivered to your inbox.