What Kind of Rattle Is It
Bathroom exhaust fan rattling has shifted noticeably with all the conflicting advice flying around. As someone who spent $200 replacing a perfectly functional fan — only to discover the original just needed a $2 clip tightened — I worked through the fundamentals of diagnosing these noises. Today, I will share it all with you. Steer clear of where I went wrong.
The sound your fan makes tells you almost everything. Stand in the bathroom for 90 seconds. That’s genuinely all it takes. You’re listening for one of three distinct rattles — and they’re different enough that you’ll know.
Cover vibration rattle
This one sounds like loose plastic buzzing. It usually hits hardest the moment the fan kicks on. Turn it on, then press your palm gently against the cover — not hard, just light pressure. If the rattle stops or shifts pitch, the cover is vibrating against the housing. That’s your diagnosis. This is also, thankfully, the easiest of the three fixes.
Blade rattle
But what is blade rattle? In essence, it’s a ticking or scraping sound coming from inside the housing — not the outside. But it’s much more than that. Place your hand on the housing itself, not the cover. If the vibration gets stronger, or if the sound clearly originates deeper in the unit, you’re dealing with blade or shaft issues. It might happen throughout the entire run, or only at startup. Either way, same diagnosis.
Motor mount rattle
This one’s a low hum with a buzzing overlay sitting underneath it. The whole fan assembly seems to shake slightly when you touch the housing. Sometimes the rattle disappears briefly, then returns. Sometimes it’s just constant. That pattern means the motor assembly has shifted inside the ceiling box — it’s not sitting where it should be.
This is the piece to know up front. Most people turn the fan on, hear something alarming, and immediately start Googling replacement units. Give yourself two minutes first. You’ll know which rattle you have.
So, without further ado, let’s dive in.
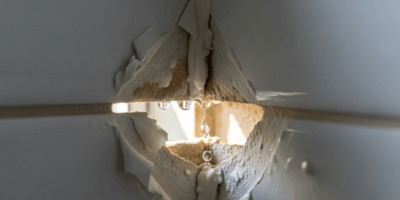
Fix a Loose or Vibrating Fan Cover
The cover is your first suspect — at least if you want the fastest possible resolution. Most exhaust fans use plastic clips or a friction-fit frame to hold it in place. These clips loosen over years of vibration and temperature swings. It’s not a design flaw. It’s just physics.
Here’s what to do.
- Turn off the fan and wait 30 seconds. The cover won’t be hot, but give the motor a moment.
- Remove the cover. Some pull straight down. Others have a small clip you press on each side simultaneously. Check your model number on the housing label — it’ll look something like “Broan 678N” or “NuTone XYZ.” Not sure how yours detaches? A five-second YouTube search of “[your model] cover removal” solves it immediately.
- With the cover off, inspect the plastic clip or frame closely. Look for bent, cracked, or missing pieces. A clip bent outward can usually be nudged back with your fingers — the plastic is flexible enough to cooperate.
- If a clip is actually cracked or broken, you have two options. Order a replacement cover — usually $15–$35 depending on the model — or cut a small piece of foam weather stripping tape and place it between the clip and the housing. That extra cushion kills the vibration without changing how the cover sits. Works surprisingly well as a temporary fix.
- Reseat the cover firmly. Push it up and in until it clicks or sits completely flush. No gaps. Don’t force it — if it’s not seating cleanly, something’s misaligned.
No tools required. No breaker switch. Zero risk. That’s what makes this fix endearing to us DIYers — it genuinely takes under five minutes and costs nothing most of the time.
Cover seems fine but the rattle’s still there? Move to the blade.
Fix a Rattling Fan Blade
Debris buildup is the second most common culprit. Dead insects, drywall dust, and lint accumulate on the blade over months — sometimes years. Even a small amount throws the rotational balance off, creating that ticking or scraping sound as the blade wobbles through each rotation. I’m apparently sensitive to high-pitched ticking and a Broan 70CFM works fine for me while a lint-clogged NuTone never stays quiet for me. Balance matters more than people realize.
This fix requires cutting power at the breaker. Don’t skip that step.
- Go to your electrical panel and flip the breaker controlling the exhaust fan. Unsure which one? Flip it off, walk back to the bathroom, confirm the light and fan are dead. Then you’ve got the right one.
- Remove the cover using the process above.
- Look directly at the blade. Buildup? Dust? Dead insects caked on the edges? Run your finger along the surface carefully. Use a dry cloth to wipe it down — not water, not compressed air. Compressed air pushes debris straight into the motor bearings. Dry cloth only.
- With the blade clean, spin it slowly with one finger. It should spin freely with no resistance. Listen for scraping or grinding. A blade that wobbles side-to-side, or scrapes as it rotates, suggests shaft or bearing damage beyond just debris.
- Visible crack on the blade? Wobble that persists after cleaning? You need a replacement blade. Search “[your model number] replacement blade” — they typically run $12–$25 and swap out in five minutes. Usually two to four bolts on the center hub. That’s it.
Cleaning the blade solves it most of the time. The balance returns and the rattle disappears. Simple as that.
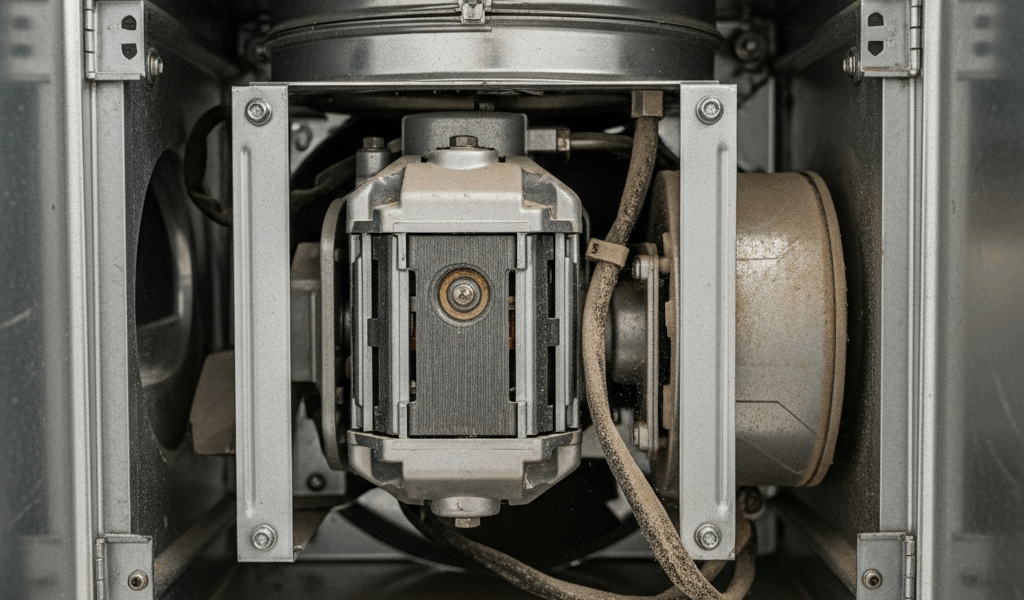
Fix a Loose Motor or Mount
The motor assembly connects to the ceiling box with screws — and vibration works those loose over time. Tightening them is usually the last step you’ll need.
- Power off at the breaker again.
- Remove the cover and look into the housing. The motor assembly sits inside. Along its edges you’ll find two or four screws attaching it to the box. Phillips head, almost always.
- Tighten each one with a screwdriver. Don’t crank hard — just snug them down until you feel resistance. You’re not trying to break anything, just eliminate the play.
- If a screw spins without catching — stripped threads — try the next size up. A slightly larger screw bites into fresh material and holds. Alternatively, a small foam shim placed under the screw head adds enough pressure to stabilize things without replacing hardware.
- Flip the breaker back on. Run the fan. Listen carefully.
Tightening those motor screws stops the rattle in most cases. If a low rumble persists underneath — not the original rattle, but a dull buzz or hum — that’s a different problem. That’s worn motor bearings. A fix for another day, or more accurately, a signal that replacement is coming.
When the Rattle Means the Fan Needs Replacing
Frustrated by a rattle that keeps returning days after every fix, most homeowners eventually confront the same question: repair or replace? This new pattern of recurring noise typically emerges several years in and eventually evolves into the persistent hum enthusiasts of quiet bathrooms know and dread today.
Some signs make replacement the obvious call.
- The fan is over 10 years old and the rattle comes back within days of tightening — not weeks, days.
- The rattle comes with noticeably reduced airflow. You can feel the difference holding your hand near the vent.
- The motor housing feels warm after just a few minutes of running. That’s not normal operating temperature.
- You’ve worked through every fix above and the noise either persists or gets worse.
While you won’t need a contractor for this, you will need a handful of basic tools and about 20 minutes. A new exhaust fan installed into the existing housing runs $60–$150 depending on the model — a Broan 110CFM sits around $85 at most hardware stores right now. Worthwhile upgrade if your current unit is aging. The quiet alone is worth it.

Stay in the loop
Get the latest northwest renovate updates delivered to your inbox.