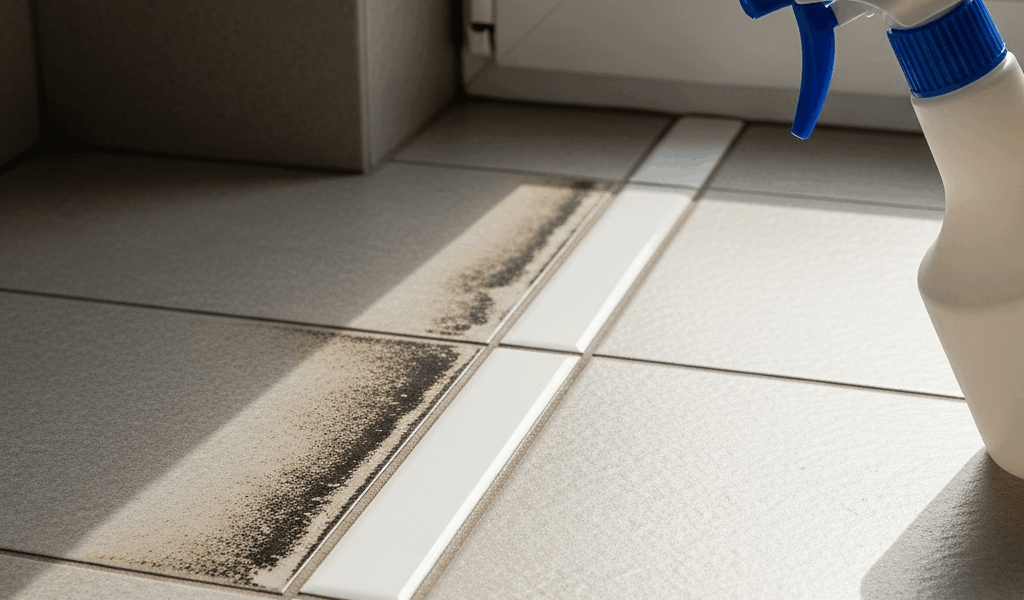
Black bathroom grout is usually one of three things: surface mold or mildew, trapped soil/soap film, or discoloration within the grout. Start with detergent and water, dry the area completely, and check whether moisture keeps returning. Do not identify “toxic black mold” by color, and do not start combining bleach, vinegar, peroxide or acid cleaners.
Safe first response
- Stop any leak and ventilate the room.
- Wear gloves and eye protection; people with asthma, chronic lung disease or immune suppression should avoid mold cleanup.
- Clean a small test area with detergent and water.
- Rinse as the surface manufacturer directs and dry completely.
- If discoloration remains, identify the tile, grout and sealer before selecting another product.
Is the black material mold, dirt or a permanent stain?
You usually cannot identify a mold species—or determine health risk—by looking at its color. A thumbnail, tissue, smell or “fizz” test is not reliable. The practical question is whether visible growth or soil can be removed and whether the moisture source can be corrected.
- Surface growth or soil: often looks irregular and is concentrated where shower water, condensation and soap film remain. It may clean away with detergent and scrubbing.
- Mineral or metal staining: may remain after ordinary cleaning. Hard-water scale is often light-colored, but deposits can trap soil or combine with metals and appear gray, brown or dark.
- Discolored grout: color can be within worn, porous or previously stained cement grout. Cleaning may improve hygiene without restoring the original appearance.
- Failed grout or caulk: cracks, missing joints, softness or recurring wetness indicate a repair or water-management problem, not merely a cleaning problem.
EPA notes that it may not be possible to restore a cleaned material to its original appearance. That distinction prevents escalating to increasingly harsh chemicals when the remaining issue is cosmetic discoloration or damaged grout.
Before cleaning: determine the safe DIY scope
EPA says that an area smaller than about 10 square feet can usually be handled by a homeowner, while larger growth, extensive water damage or suspected contamination behind materials warrants more careful professional evaluation. The square-foot guideline refers to the area of mold growth—not the total amount of grout in the room.
Do not perform the cleanup yourself if you have immune suppression, an underlying lung condition, chronic respiratory disease or significant mold allergy. CDC recommends protecting the mouth and nose, skin and eyes during mold cleanup; at minimum, use an appropriately fitted NIOSH-approved N95 respirator, protective gloves and goggles when disturbing visible mold.
Stop and investigate before cleaning if tile moves, the wall feels soft, water appears outside the shower, grout is crumbling, caulk has separated, or discoloration returns quickly in exactly the same wet location. These signs can point to a leak, failed joint or wet substrate that surface cleaning cannot correct.
How to clean black grout safely
1. Ventilate and protect nearby surfaces
Run a bathroom fan that exhausts outdoors and open a window or door if outdoor conditions allow. Remove towels and toiletries from the work area. Check the cleaning-product label and the tile, grout and sealer manufacturer’s care instructions. Natural stone, colored grout, epoxy grout and sealed cement grout can have different chemical restrictions.
2. Begin with detergent and water
EPA’s core recommendation for mold on hard surfaces is to scrub with detergent and water and dry completely. Apply a compatible neutral cleaner or a small amount of dish detergent diluted according to its label. Use a nylon grout brush; avoid wire brushes that can scratch tile or erode joints.
- Wet only the small area you can clean and dry promptly.
- Allow the detergent the label’s stated contact time.
- Agitate the grout with a nylon brush.
- Rinse or wipe away residue as the surface-care instructions require.
- Dry with clean towels and ventilation.
Do not caulk or seal over visible mold. EPA and CDC both advise cleaning the growth and correcting the water problem before covering a surface.
3. Reassess after the grout is dry
If the black material is gone, focus on moisture prevention. If a dark line remains but no material transfers during normal cleaning, it may be embedded staining, worn grout color or contamination below the surface. Repeated aggressive scrubbing can damage the joint without restoring its color.
If the grout is intact and the issue appears to be a mineral or product stain, contact the grout/tile manufacturer or use a cleaner explicitly labeled for that material. Test in an inconspicuous area. Natural stone requires stone-compatible products; acidic cleaners can etch marble, limestone and travertine and may damage cement grout or sealer.
Should you use bleach on shower grout?
Bleach is not the required first step for ordinary grout cleanup. EPA recommends detergent and water for hard surfaces. If you choose a bleach-containing product, follow its label and verify that it is compatible with the tile, grout, colorant and sealer.
CDC’s safety rules are firm:
- never mix household bleach or another disinfectant with any other cleaner;
- provide good ventilation;
- clean visibly dirty surfaces before disinfecting;
- wear the protective equipment specified on the label;
- use the label’s dilution and contact time.
Do not mix bleach with vinegar, ammonia, an acid cleaner, peroxide or a commercial bathroom cleaner. Mixing products can release dangerous vapors or cause unpredictable reactions. Do not apply one chemical immediately after another unless the manufacturer explicitly provides a compatible, fully rinsed procedure.
Avoid blanket recipes such as “one part bleach to one part water.” Household products differ, and a strong mixture may discolor grout, harm sealer or create unnecessary exposure. CDC says that when a bleach label has no directions for a relevant disinfection use, the maximum mold-cleanup mixture should be no more than one cup of bleach per gallon of water; the product label and surface compatibility still control.
Why vinegar, muriatic acid and DIY poultices are risky defaults
Vinegar and acid cleaners are often promoted for hard-water deposits, but they are not universal grout cleaners. Acids can attack cement-based grout and etch acid-sensitive stone. Muriatic acid is not an appropriate first-line household shower-grout treatment. Baking soda, peroxide and other homemade pastes can also leave residue or affect a sealer, and they should never be layered with bleach products.
If a neutral-cleaner test does not change a persistent stain, identify the installed materials before escalating. A tile or grout manufacturer, qualified tile contractor or restoration professional can recommend a compatible test product. For a small cosmetic problem, grout colorant or targeted regrouting may be safer and more predictable than repeated acid treatment.
Stop black grout from returning
Moisture control matters more than the brand of cleaner. EPA recommends keeping indoor relative humidity below 60 percent and ideally between 30 and 50 percent. Bathroom fans should exhaust outdoors, not into an attic or another interior space.
- Run the exhaust fan during bathing and long enough afterward for surfaces and humidity to return toward normal.
- Squeegee or towel standing water from shower walls and ledges.
- Leave the shower enclosure open to dry when practical.
- Repair plumbing leaks and failed caulk promptly.
- Clean soap film routinely so organic residue does not accumulate.
- Use a hygrometer if the room stays damp or condensation lingers.
Sealer can reduce absorption in some cementitious grout, but not every grout needs or accepts the same sealer. Sealing does not waterproof a failed shower assembly and must not be applied over damp or moldy joints. Follow the grout and sealer manufacturers’ instructions for compatibility, drying, cure time and reapplication.
When to replace grout or call a professional
Get qualified help when:
- visible mold covers more than about 10 square feet;
- there was extensive water damage or contaminated water;
- growth returns after cleaning and moisture control;
- grout is soft, loose, missing or repeatedly wet;
- tile moves or the wall/floor feels soft;
- you suspect growth behind tile, drywall or a shower assembly;
- the surface is expensive or acid-sensitive stone;
- a household member should not be exposed during cleanup.
Ask a mold-remediation contractor about its experience and references. For failed grout, caulk or waterproofing, a qualified tile professional may be the more relevant first call. Avoid anyone who promises to diagnose mold species by color alone or proposes sealing over active growth.
Frequently asked questions
Does black grout automatically mean black mold?
No. Color alone cannot identify a mold species, and grout can also appear dark from soil, soap film, minerals, metal staining, worn color or moisture. Clean and dry a small area, then investigate why it remains wet or discolored.
Why does black grout return after cleaning?
Recurring growth usually means moisture is returning through humidity, condensation, standing shower water, a leak or a failed joint. Surface cleaning cannot compensate for a continuing water source.
Can I seal grout immediately after cleaning?
Only after the grout is clean, sound and fully dry and the product is compatible. Follow the sealer manufacturer’s drying and cure instructions. Never seal over visible growth or an unresolved leak.
What if the black stain will not scrub off?
Stop escalating blindly. The remaining color may be embedded staining, damaged grout, old colorant or contamination beneath the surface. Identify the material and test a manufacturer-approved cleaner, colorant or repair approach.
Official sources
- U.S. EPA: Mold Cleanup in Your Home
- U.S. EPA: Ten Things You Should Know About Mold
- U.S. EPA: Biological Contaminants and Indoor Air Quality
- CDC: Mold Cleanup Guidelines and Recommendations
- CDC: Cleaning and Disinfecting With Bleach
Recurring dark grout or sealant can indicate moisture-management trouble. Homeowners considering panel replacement should first read the FRP shower-wall waterproofing and substrate guide.



Stay in the loop
Get the latest northwest renovate updates delivered to your inbox.