Why Bathroom Vanities Swell and How to Spot It Early
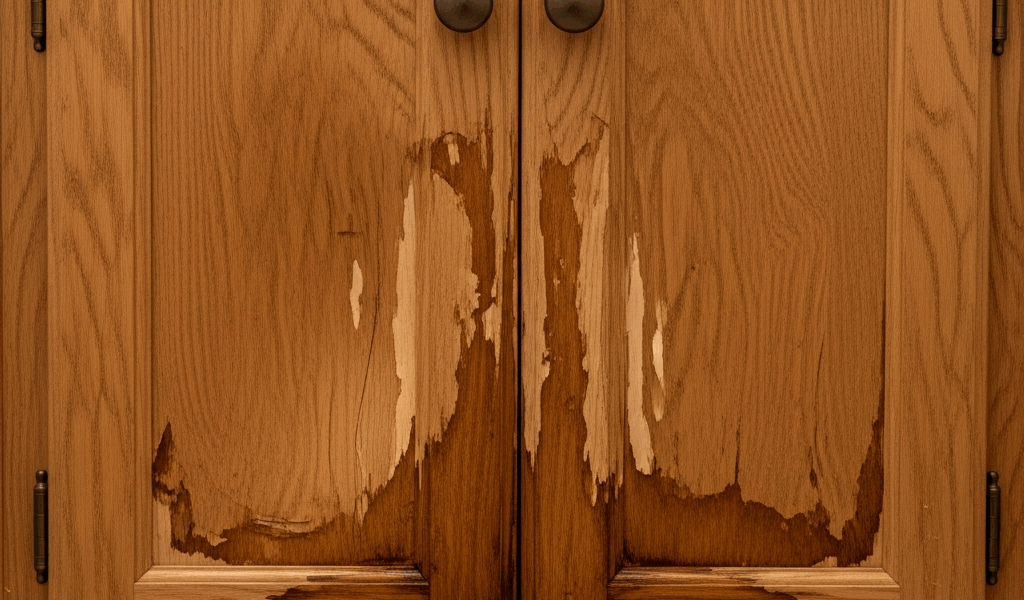
As someone who spent three years flipping rental properties before settling into my own home, I learned to recognize water damage in bathroom vanities the hard way—usually after it was too late. Bathroom vanity cabinet swelling from water damage has gotten complicated with all the ignored warning signs flying around.
The sources of moisture are deceptively simple, honestly. A slow drip under the sink isn’t dramatic. You miss it. The caulk around your faucet cracks just slightly—barely visible. Meanwhile, every time you shower, humid air condenses on the cabinet’s exterior and seeps into exposed edges and joints. Spilled water while filling the toothbrush cup adds more. Floors flood during toilet overflows. These small exposures compound over weeks and months, and before you know it, you’ve got a real problem on your hands.
Particleboard and MDF—the materials in roughly 70% of bathroom vanities—are particularly vulnerable to this kind of damage. Unlike solid wood, they’re made of compressed wood fibers bonded with adhesive. Water breaks those bonds. The material swells unevenly, creating visible deformation that’s hard to ignore once you see it.
Look for these four early warning signs:
- Soft spots when pressed. Run your hand along the cabinet’s underside. If areas feel spongy or yield to moderate finger pressure, moisture has compromised the material.
- Slight bulging or warping. Stand back and look at the cabinet’s profile. Swollen sections stick out, particularly noticeable on the front face or around drawer openings.
- Paint or laminate bubbling. The finish separates from the substrate in small blisters. This happens because the material underneath is expanding.
- Drawers sticking or rubbing. A vanity drawer that suddenly doesn’t slide smoothly? The swelling has changed the geometry of the frame.
Probably should have opened with this section, honestly. I ignored slightly sticking drawers in my guest bathroom for six months straight. By the time I pulled the vanity out, the back panel felt like wet cardboard. Don’t make my mistake.
Quick Damage Assessment Before You Call a Contractor
Before you panic and call a plumber or cabinet maker, spend 15 minutes running these tests yourself. They’ll determine whether this is a DIY fix or a contractor situation — at least if you want to avoid unnecessary expenses.
The Press Test
Use your thumb to apply steady pressure on suspected swollen areas. Minor damage: the material springs back within a second. Moderate damage: it returns slowly or stays slightly compressed. Severe damage: your thumb leaves a permanent indent or the material crumbles slightly.
The Visual Inspection
Remove cleaning supplies and get a flashlight under the sink. Look for visible mold (black or green spots), staining, or the wood fibers separating from the surface. Check the back panel where the wall meets the cabinet—this spot collects water runoff and is often where problems start.
The Smell Test
Open the cabinet and take a deliberate sniff. Musty or sour smells indicate active mold growth. Fresh, neutral smell is normal. Rotten or severely acrid smell means the damage is deep and systemic.
Severity Scale for Self-Assessment
Minor: Soft spots in one or two small areas (2–3 inches), no visible swelling, no mold smell, drawers function normally.
Moderate: Visible bulging (1/8 inch to 1/4 inch), soft spots covering 20–30% of the cabinet, faint musty smell, slight drawer sticking.
Severe: Bulging exceeds 1/4 inch, material crumbles when pressed, mold visible, drawers won’t close or open properly, or water actively drips when you move the cabinet.
Minor to moderate swelling is usually salvageable with effort and the right approach. Severe damage almost always requires replacement—the structural integrity is compromised beyond safe repair.
How to Dry Out and Repair Mild to Moderate Swelling
Equipped with a dehumidifier, oscillating fans, and wood filler, I tackled my guest bathroom vanity on a Friday. By Wednesday morning, it was functional again. That was a relief.
Step 1: Locate and Stop the Water Source
Identify where moisture is entering. Is it a leak under the sink? Check the P-trap and water supply lines. Loose caulk around the faucet base? Poor grout on the backsplash? A crack in the sink itself? Fix the source first, or swelling will resume immediately.
Tighten supply line connections. Re-caulk gaps using 100% silicone caulk (not acrylic—it shrinks and fails). Grout cracks. Replace the P-trap if it’s corroded. These steps take an afternoon and cost $20–$60 in materials.
Step 2: Remove the Vanity and Expose It to Air
Turn off water at the shut-off valves. Disconnect the P-trap and supply lines. Unscrew the vanity from wall studs and floor. Pull it away from the wall completely. This exposes all surfaces to air circulation—critical for drying.
Step 3: Aggressive Drying
Position two oscillating fans to blow across the cabinet from different angles. Run a large dehumidifier nearby—the 30-pint per day models cost $150–$250 and work quickly. Aim for indoor humidity below 40%. Check hourly.
This phase takes 24–48 hours minimum. Open cabinet doors and drawers fully. Remove any removable shelves or components. I propped mine up on sawhorses to allow airflow underneath, which made a real difference in how quickly it dried.
Step 4: Sand and Fill Swollen Areas
Once the material is completely dry and still structurally sound, level only minor high spots gradually; severely swollen or crumbling particleboard usually requires replacement rather than aggressive sanding. Use source dust extraction and protection appropriate to the material. Our orbital-sander comparison and selection guide explains pad types, dust connections, and controlled technique.
For small voids or splintered areas, fill with epoxy wood filler. Brands like Bondo Wood Filler run $8–$12 per can. Mix according to package directions. Press it into gaps with a putty knife. Let it cure fully—usually 2–4 hours—then sand smooth with 120-grit.
Step 5: Seal Exposed Edges
Before reinstalling, seal any exposed particleboard edges or raw wood surfaces with polyurethane sealant or marine-grade epoxy. This prevents future water absorption. Two coats, drying time between coats, takes one evening and costs about $15–$20 in sealant.
Step 6: Reassemble and Reinstall
Reattach the P-trap and supply lines. Slide the vanity back into place. Screw it to the wall studs (use corrosion-resistant screws). Re-caulk the top seams where the vanity meets the wall and sink with fresh 100% silicone.
Total time: 72–96 hours from removal to full function. Total supply cost: $40–$100, depending on what you already have on hand.
Reinforcement Techniques to Prevent Future Water Damage
After one repair, I wasn’t waiting for a second bathroom vanity disaster. I implemented several changes that have worked surprisingly well.
Upgrade Your Caulking Strategy
Use 100% silicone caulk, not acrylic or acrylic-latex blends. Silicone resists mold and lasts 10+ years without degradation. Apply a continuous bead around the faucet base, along the backsplash, and where the countertop meets the wall. Re-caulk annually if you notice gaps forming.
Install Under-Sink Protection
A waterproof mat ($15–$25) catches slow drips before they soak the cabinet. I use a rubber shelf liner from IKEA—cost me $3. It won’t catch a major leak, but it buys time for minor issues.
Better option: install an under-sink water detection alarm. Brands like Honeywell or First Alert ($25–$40) alert you to moisture before damage occurs. That early warning is worth its weight in gold when you consider repair costs.
Improve Hardware and Ventilation
Use stainless steel or brass P-trap fittings instead of plastic—they resist corrosion far better. Cost difference: $5–$10 per fitting. Add a ventilation fan if your bathroom lacks one, or run your existing fan for 20 minutes post-shower. This reduces ambient humidity that seeps into cabinet seams and edges.
Consider a Moisture-Resistant Vanity Material
If you ever replace this vanity, explore options beyond standard particleboard. Solid wood vanities cost 40–60% more but handle moisture dramatically better. Alternatively, some manufacturers now make vanities with waterproof interior compartments using marine-grade materials. Brands like Vanity Art and Home Decorators Collection offer these at $300–$700, compared to $150–$400 for basic particleboard models.
When Repair Costs More Than Replacement
Here’s the reality check: repair only makes sense when damage is contained and materials are still structurally sound. Beyond that, you’re throwing money at a losing battle.
Repair costs: $40–$150 in supplies, plus 72–96 hours of your labor. If you’re paid hourly and value your time at $25/hour, you’re looking at $200–$400 total. If you hire a contractor for the drying and finishing work, add $500–$1,000 to that figure.
Replacement costs: New vanity cabinets range from $150–$300 (basic particleboard) to $800–$2,000+ (quality solid wood or custom). Installation labor runs $200–$600. Total: $350–$2,600 depending on quality and your location.
If repair costs are approaching 60% of replacement cost, replacing makes more sense financially. You also get a warranty, new hardware, and the peace of mind that comes with a fresh installation.
Example: A standard 36-inch vanity costs $180 to buy new, plus $250 for installation labor. Total: $430. If fixing your swollen cabinet requires $150 in supplies and a contractor to dry and repair costs $350, you’re at $500. In that case, replacement is actually cheaper and gives you something brand new.
Severe damage—where swelling affects the frame structure, mold is systemic, or the cabinet barely supports the sink—always warrants replacement. The structural failure risk isn’t worth $200 in savings.
Minor swelling caught early? Repair wins financially and environmentally. Moderate swelling in a vanity you’re otherwise happy with? Repair is reasonable and doable. Severe swelling or a vanity you’ve wanted to replace anyway? Order the new one and move forward.
Related: If the joints are dark or spotted rather than cracked, use this safe black-grout cleaning and moisture guide before applying caulk, sealer or a stronger chemical.

Stay in the loop
Get the latest northwest renovate updates delivered to your inbox.