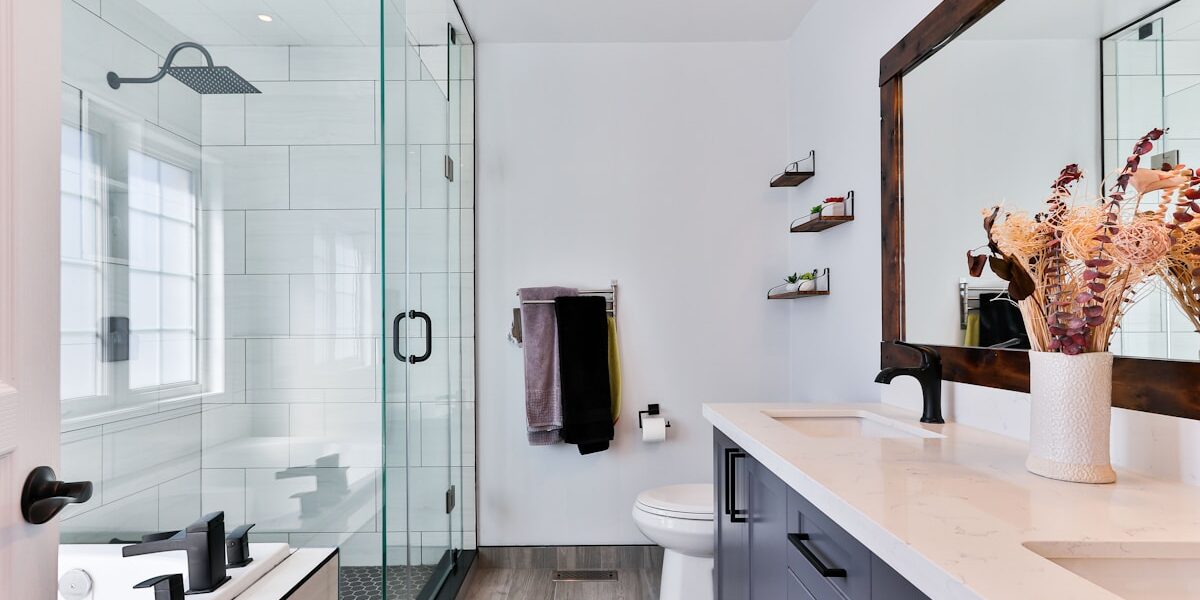
FRP panels can work on shower walls only when the panel manufacturer permits that use and the entire installation is treated as a wet-area system. The face of fiberglass-reinforced plastic is water-resistant, but a sheet by itself does not make a shower waterproof. Water can reach the wall through panel edges, penetrations, failed sealant, or poorly fitted trim.
For a shower, choose a documented FRP product, compatible substrate, specified adhesive, trim, and sealant as one assembly. Crane Composites says shower installations need sealed joints and angles, expansion space, waterproof adhesive, and full adhesive coverage because hot water repeatedly soaks the walls. Marlite likewise requires trim around every panel edge in wet areas and a continuous sealant bead.
What FRP shower panels are
FRP means fiberglass-reinforced plastic. Standard interior FRP is generally a thin, rigid sheet installed over a continuous subwall. It is common in commercial kitchens, healthcare spaces, utility rooms, and other areas where a durable, washable surface matters. Manufacturers offer different textures, colors, thicknesses, fire classifications, moldings, adhesives, and complete wall systems.
Do not confuse thin FRP sheets with one-piece fiberglass shower surrounds. A molded surround has factory-formed corners and fewer field seams. Sheet FRP depends much more heavily on substrate preparation, adhesive coverage, expansion gaps, trim, and sealant workmanship.
Is FRP waterproof enough for a shower?
The panel surface resists water, but the installation is only as reliable as its edges and penetrations. Crane’s shower guidance specifically notes that panel edges and backs are vulnerable to moisture that gets around molding. That is why its instructions call for sealing joints and angles while preserving the required expansion gap.
Before buying panels, obtain written answers to these questions from the product manufacturer:
- Is this exact panel approved for a shower stall or continuously wet location?
- Which substrates are permitted behind it?
- Is a separate water-resistive or vapor-control layer required by the system, code, or wall design?
- Which adhesive, trim, and sealant are compatible?
- How should plumbing penetrations, inside corners, outside corners, and the tub or receptor transition be detailed?
- What expansion gaps and environmental conditions are required?
If the instructions only describe kitchens, corridors, or general moisture-prone rooms, do not assume the same product is approved inside a shower. Use a listed shower-wall system or another assembly designed for direct water exposure.
FRP shower walls: advantages and tradeoffs
| Factor | Potential advantage | Important limitation |
|---|---|---|
| Cleaning | Smooth or lightly textured faces are washable | Seams, trim, and sealant still need inspection and cleaning |
| Installation time | Large sheets cover a wall quickly | Accurate cuts, full adhesive transfer, and bracing or rolling are essential |
| Cost | Material and labor may be below premium tile | Compatible trim, adhesive, substrate repair, and professional labor add cost |
| Durability | FRP resists routine wear and many stains | Impact, heat, harsh cleaners, and failed seams can damage the assembly |
| Appearance | Clean, simple, and available in several finishes | Visible seams and commercial styling may not suit every bathroom |
| Repair | A damaged sheet can sometimes be replaced | Removing a fully adhered panel may damage the subwall and adjacent trim |
Substrate and wall preparation
The wall must be flat, dry, structurally sound, clean, and compatible with the selected adhesive. Existing paint, soap residue, loose coatings, glossy tile, uneven framing, and moisture-damaged drywall can prevent a reliable bond. Crane warns that retrofit shower work may require stripping walls so soap residue or loose paint does not interfere with adhesion.
Do not cover active leakage, mold, soft gypsum, or rotted framing. Find and repair the moisture source first. If the shower wall is out of plane, correct it before installing sheets; FRP can telegraph uneven areas, and forcing a panel flat can create stress or poor adhesive contact.
Adhesives are not interchangeable. Some require a porous surface so moisture can leave during curing; others are intended for nonporous substrates. Follow the panel and adhesive instructions together. A product that bonds FRP to unfinished drywall may not be approved over painted drywall, tile, foam, or a particular backer board.
FRP shower-wall installation sequence
This is a planning sequence, not a substitute for the exact manufacturer’s instructions or local requirements:
- Confirm the assembly. Verify the panel, substrate, adhesive, molding, sealant, and wet-area use in current product documentation.
- Repair and flatten the wall. Resolve leaks and damaged materials; remove contaminants and unsupported coatings.
- Acclimate the panels. Marlite instructs installers to place panels in the installation environment for at least 24–48 hours. Use the period specified for your product.
- Dry-fit and plan seams. Lay out corners, joints, plumbing openings, top edges, and the lower transition before applying adhesive.
- Cut safely. Support sheets fully and use the manufacturer’s recommended cutting tools. Wear eye, respiratory, skin, and hearing protection appropriate for fiberglass dust and power tools.
- Leave expansion space. Do not wedge sheets tightly into trim. Required gaps vary; Marlite’s instructions specify space within molding channels, while other guides may give different dimensions.
- Apply the approved adhesive. Use the required trowel pattern, coverage, open time, and working time. Crane calls for waterproof adhesive and 100% backside coverage in its shower guidance.
- Seat and roll the panel. Work the sheet into full contact according to the installation guide. Remove trapped air without starving the adhesive bed.
- Install and seal trim. In wet areas, Marlite calls for trim around all panel edges with a continuous bead of compatible sealant.
- Detail every penetration. Faucets, shower arms, valves, grab-bar fasteners, and accessories need manufacturer-approved water-management details and adequate backing.
- Respect cure time. Do not expose the installation to shower water until adhesive and sealant have cured for the specified conditions.
Common FRP shower mistakes
- Calling the panel itself a waterproofing system. The face may resist water while edges and the backside remain vulnerable.
- Using generic construction adhesive. An incompatible adhesive can attack a panel, fail to cure, or release from the substrate.
- Skipping acclimation and expansion gaps. Panel movement can produce buckling, bubbles, or stressed seams.
- Installing over a wet or contaminated wall. Adhesive cannot correct leaks, mold, soap film, loose paint, or deteriorated gypsum.
- Relying on caulk alone at complex transitions. Corners, receptor flanges, niches, and penetrations need a documented detail, not an improvised bead.
- Fastening through the face without approval. Unplanned fasteners create penetrations and can restrict movement.
- Mixing products without compatibility confirmation. Panel, adhesive, trim, and sealant warranties may depend on an approved system.
FRP vs tile vs acrylic shower surrounds
Choose FRP when
A manufacturer explicitly supports the shower application, the utilitarian appearance is acceptable, the subwall can be prepared correctly, and the installer can execute the wet-area seams and transitions. It can be practical for a workshop washroom, rental utility bath, or other function-first space.
Choose a molded acrylic or fiberglass surround when
You want fewer field seams and a product designed specifically around a tub or shower receptor. Verify exact dimensions, flange details, backing, and valve locations before purchase.
Choose tile when
You want broader design options and are prepared to build a complete tile shower assembly. Tile and grout are finish materials; the approved waterproofing and drainage details behind them remain essential.
For wider project planning, see our bathroom remodel guide. If deteriorated joints are the main problem rather than the wall finish, use the bathroom caulk diagnosis before covering anything.
Maintenance and inspection
Use cleaners permitted by the panel manufacturer and avoid abrasive tools that can dull or scratch the face. Periodically inspect lower edges, corners, trim, sealant, plumbing penetrations, and any fasteners. Soft walls, swelling, staining, persistent odor, loose panels, or recurring failed sealant can indicate moisture behind the finish and should be investigated rather than repeatedly caulked over.
FRP shower-wall FAQ
Can FRP go directly over drywall in a shower?
Only if the exact panel system, adhesive instructions, wall design, and local requirements permit that substrate in the wet location. Do not infer shower approval from a general statement that FRP can bond to drywall.
Can FRP be installed over tile?
Some product-and-adhesive combinations allow installation over a properly prepared nonporous surface, while others do not. Existing tile must also be sound, flat, clean, and free of moisture problems. Obtain written compatibility instructions for the exact products.
Does FRP need expansion gaps?
Yes. Panels move with temperature and humidity. Gap dimensions and trim details vary, so use the current installation guide rather than a generic measurement.
How long should FRP acclimate?
Marlite’s standard instructions specify at least 24–48 hours in the room before installation. Other products may differ. Keep the installation environment close to expected service conditions and follow the selected manufacturer.
Can ordinary silicone seal every FRP shower seam?
Do not assume so. Use the sealant and trim system documented as compatible with the panel, substrate, joint movement, and wet-area application.
Official installation references
- Crane Composites: FRP installation guide and shower-stall information
- Marlite: Standard FRP installation instructions
- Marlite: Standard FRP product and installation overview
Always follow the current instructions for the exact products purchased. Building-code, permit, fire-rating, accessibility, and moisture-control requirements vary by location and project.


Stay in the loop
Get the latest northwest renovate updates delivered to your inbox.